Your Handyman in Brussels Area

Property Management, Services

Your reliable handyman in Brussels area & surroundings!
Uw betrouwbare klusser in de regio Brussel en omstreken!
Votre bricoleur fiable dans la région et les environs de Bruxelles!

Visit about.me/brusselshandyman

Property & House Maintenance, Home Improvement, Repair Services, Attics, Plastering, Patching up, Coving, Plaster, Board installation, Bathrooms, Carpentry, Decks Doors, Drywall, Electrical , Flooring, Tile, Full Indoor / Outdoor Painting, Garages, Plumbing, Windows, Roof, Wood Treatments, Garden Furniture, Fencing, Pavement, Isolation, Furniture Assembling, Anti Moisture Treatments.

Experience, flexibility and 100% satisfaction guarantee!
Ervaring, flexibiliteit en 100% tevredenheidsgarantie!
Expérience, flexibilité et de satisfaction 100% garantie!

tel.: 0465667627
brusselshandyman@gmail.com
http://about.me/brusselshandyman

“The Brussels Handyman” is a concept of www.skillplus.be


Video production by TEaM|FullPicture www.fullpicture.eu

15 creative ideas to decorate your wall

Services

The right design and color combination can completely transform any place into a friendly, welcoming and tasteful space.
Do you have in your room a complaining nude wall, and want to turn it into an original one? Well, here’s 15 new ideas how to beautify your room!
Creativity is required, but the most important is to play with shapes and colors. We invite you to get inspired:

1. Mirrors scale any room. For narcissists we propose a wall decorated with vintage-style mirrors: oglinzi-vintage2-hyperflash

2. Old books have personality and style. If you’re in bohemian style, some worn books (or pages of used books), placed on the wall in accordance with golden tones, ocher and green jade objects / walls (preferably) could be your taste.

carti-vechi-hyperflash

3. An ordinary tapestry may deliver a sensational effect.

goblen-banal-hyperflash

4. Buttons in a picture composition. If we take some buttons of the same color tones and shapes and play with them, we sure get a funny effect.

nasturi-nastrusnici-hyperflash

5. Flowers made from intense and warm colored handkerchiefs that contrast with the background.

flori-din-carpe-hyperflash

6. Clock of family members’ pictures. In order to remember that time spent with family is – always – priceless.

ceasul-familiei-hyperflash

7. Xmas tree lights used not only Christmas tree. The lights can decorate the wall and can also be support for photos.

instalatia-de-craciun-hyperflash

8. Funny colored cardboard circles, can give a cheerful touch on a plain white wall.

cercuri-nastrusnice-hyperflash

9. Pompons of crepe paper. Although initially are used in cheerleaders’ celebrations, we believe that it would look good as a decor all-together with a small table on the same color as a bar, which is the focal point to any birthday party or which may be hosted at home.

pomponi-hyperflash

10. Cardboard rolls of toilet paper, recycled for decorative and creative. We can paint cardboard rolls inside or outside the desired color, then glue them to each other in such a way to give them a nice design and final assembly just have to be put on the wall. Reusing things that are normally discarded is always fantastic!

hartie-igienica-hyperflash

11. Decorations of corks. If you get used to collect corks, remember that you can use them on aesthetic purposes! This less common decoration sitting next to a bowl of ancient tint can give the room an air of a tale.

dopuri-vin-pe-post-decorativ-hyperflash

12. Magic feathers glitter. If you want to give your room an air of magic you can try this option.

decoratiune-cu-pene-hyperflash

13. Honeycomb Wall. Transform your entire wall into a work of art with this design that mimics a honeycomb. It takes a bit of work with wood, but surely will be worthy.

perete-fagure-de-miere-hyperflash

14. Framed kiss print. This is obviously a girlie decoration for women and can be located in the place where you keep your cosmetics.

kiss-print-hyperflash

15. Hippie fringes on a branch. This parade of colors of yarn knitting or weaving a piece of wood, make a rustic and folk room.

franjuri-hippie-pe-o-creanga-hyperflash


Don't forget to like & share our FB page ! :)

30 fixes every homeowner should know

Property Management

Not every home’s a fixer-upper, but all houses need occasional repairs and maintenance. You’ll be able to handle those jobs like a pro if you make sure you have these 30 key home improvement skills under your belt. They’ll come in handy whether you’re redoing the house, upgrading a room, or just trying to keep everything in top condition.

1-toilet-1Toilet triage

In the life of every homeowner, there will be some clogged toilets. But they’re simple to fix with a plunger, an auger, rubber gloves, and a bucket. If the bowl is in danger of overflowing, shut off the water supply valve behind the toilet and empty out half of the water. Try a plunger first, but if that doesn’t work, grab an auger.

Clearing out the gutter2-gutter-1

Even the ladder-averse can clean the gutters twice a year to prevent pests and ice dams. Remove leaves by hand or with the assistance of a leaf blower, garden hose or wet-dry vac. When you’re up on a ladder, be sure to use a stabilizer. If sticking to ground level is more your style, you can still get the job done if you have special attachments for your leaf blower or wet-dry vac.

3-faucet-1Stopping the drips

Leaky faucets can be fixed with a little elbow grease and know-how. First, turn off the water to the sink and stop the drain with a rag so you don’t lose any small parts while you’re dismantling the faucet. A compression faucet needs a new rubber washer to seal the valve, and a drippy washer-less faucet can be stopped up with a new O-ring.

Warming up to furnace filters4-furnace-1

The simplest way to maximize furnace efficiency is quick, easy, and all-to-often forgotten: Make sure to change your furnace filter every two months. Choose the right filter for your model, turn off your furnace, and remove the service panel to swap out the old filter for the new one. Each furnace is different, so consult your manual first.

5-hardwood-1Caring for hardwood floors

Hardwood floors are often a home’s most inviting feature. You can keep them that way with proper care. Use cleaning products designed for hardwood — other cleansers can cause damage. A little water on a cloth works wonders on spills, but too much water will damage the wood. For fabulous floors, vacuum frequently using a hardwood floor attachment to grab dust from between boards without scratching.

Replacing a shower head6-shower-1

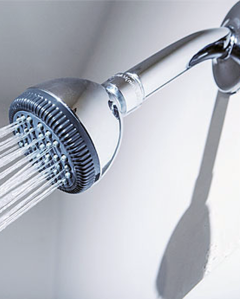
Replacing a shower head is a small project with a big impact. Remove the existing shower head, then lay thread seal tape at the base of the shower arm before screwing in the new piece. Don’t fasten it too tightly. Replace the shower arm if you like — they’re often sold separately.


7-thermostat-1Installing a new thermostat

A programmable thermostat is a big step toward energy efficiency, and it’s easy to install. Turn off the breaker to your furnace and air conditioner, then remove the old thermostat, leaving the wires in place. The number of wires (two or four) will help determine which type of thermostat you should buy. Either way, you’re on the road to easier heating and cooling.

Putting in a ceiling fan8-ceilingfan-1

Ceiling fans need a different light box than other fixtures to support their extra weight. After removing old fixtures, install the new electric box and follow manufacturer’s instructions to connect the wires and install the fan. Always remember to cut the power before performing electrical work.


9-trellis-1Building a low-cost trellis

A rustic trellis can be fashioned from green saplings, dry wood or bamboo poles fastened together with garden twine. You can make a trellis in whatever dimensions are necessary to accommodate your garden’s climbing plants, but for a larger trellis, you’ll need to figure out how to stake it securely into the earth.

Creating window boxes10-windowbox-1

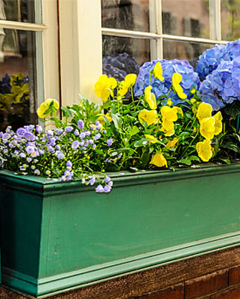
The perfect project for a beginner woodworker, a window box should be cut to the inside width of the window frame, plus 1½ inches. Fit the pieces together with a simple butt joint. Screw the boards together and drill drainage holes on the bottom. Attach the box using heavy-duty screws or brackets to make sure that your favorite flowers have a secure home.

11-wallstuds-1Locating wall studs

Hanging a shelf or a heavy mirror? It’s best to know where your wall studs are before you start — to save your time and your walls! When you knock on a wall, a spot with the stud behind it will sound solid. Alternatively, use a magnetic stud finder that beeps when it locates the nails in the boards. Happy hunting!

Getting tiles sparkling clean12-tiles-1

For squeaky-clean porcelain tiles, sweep and vacuum twice a week. Soak with a water-vinegar mixture for five to 10 minutes once a month for a deep clean, and scrub with a soft-bristled brush. Dry with a microfiber cloth. To keep tiles looking new, avoid bleach, wax, oil-based cleansers and hard scrubbers. 

13-shrubs-1Planting shrubs

Whether or not you have a green thumb, you should be able to plant shrubs. Increase your odds of success by picking a plant that will fare well in your climate, and plan on getting it in the ground in early spring or fall. Test the soil drainage (higher ground means faster drainage) before planting, and dig a hole twice as big as the root ball and deep enough so the ball is level with grade.

Hanging up shelves14-shelves-1

Need some vertical storage? You can put up shelves, but make sure they’re attached to the wall studs for a supportive base. Otherwise, use wall anchors that can support the amount of weight you’d like the shelves to hold. Always use a level before you drill. If you don’t have a traditional or laser level, you can download a level app to your smartphone.

15-sink-1Unclogging a sink

If you have a clogged sink, skip the chemical drain cleaners — they probably won’t fix anything. Your problem may be a blocked P-trap. Check this U-shaped pipe under the sink by first placing a bucket underneath it and then unscrewing the pipe. If it turns out that the P-trap isn’t your problem, we’ve got more DIY steps for you to take.
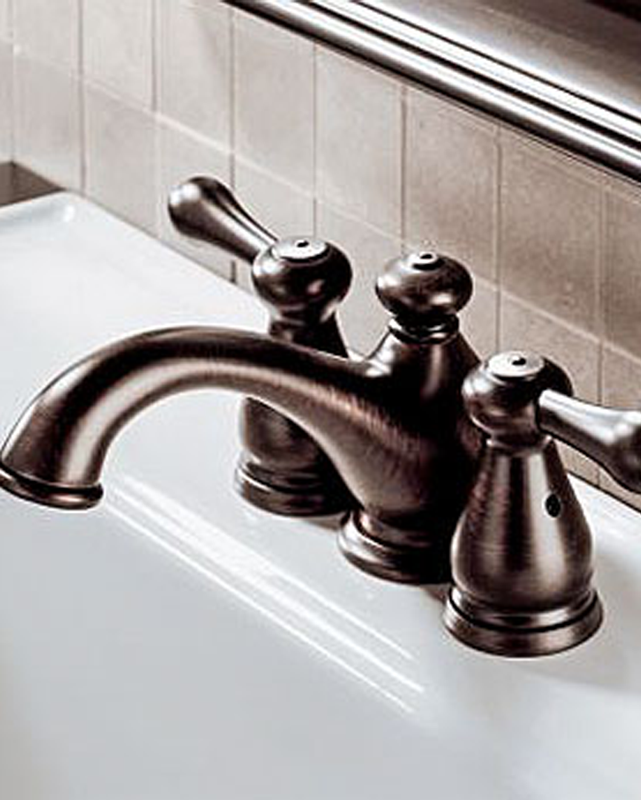
Replacing a faucet16-faucet-1

Replacing a faucet might sound impressive, but it’s not too tough. Choose a new fixture that has holes in the same locations as the old one to ensure that it will fit properly on the sink. Before working under the sink, snap a picture so you know how to put everything back together. Shut off the water, drain the faucet, then follow the manufacturer’s instructions.
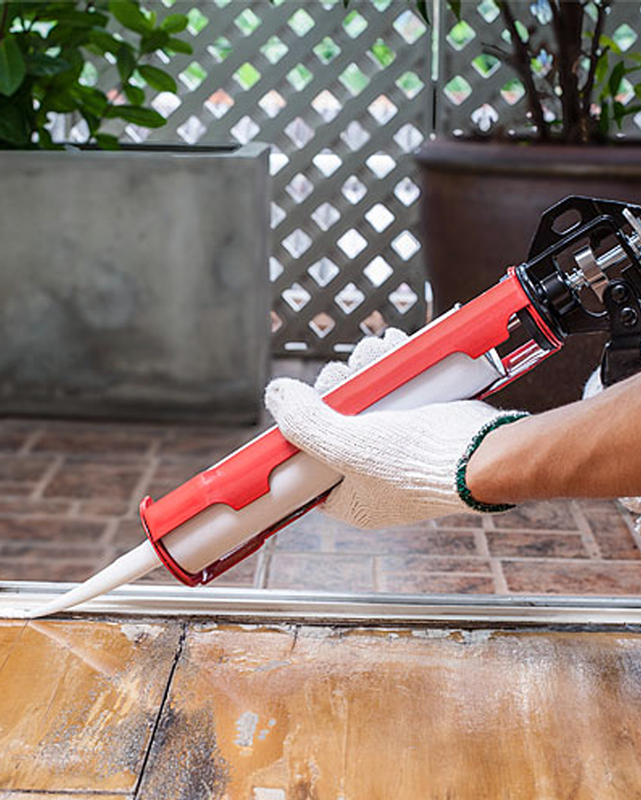
17-caulkgun-1Using a caulk gun

Filling gaps indoors or weatherproofing your exterior is simple with a caulk gun. To use, pull back the plunger and insert the tube. Cut the plastic applicator at a 45-degree angle to slow the flow of caulk. A softer touch on the trigger allows better control of the sealant.


Pressure washing18-pressure-1

Yikes! Can you even recognize your exterior paint color under all that grime? Cleaning your exterior with a pressure washer can remove several years’ worth of dirt. Work from the top down, and to keep from stripping paint or damaging siding, avoid pointing the hose at a 90-degree angle. Your house will be beautifully grime-free in no time.

19-raisedbed-1Building raised beds

Don’t let poor soil quality stop you from starting a garden — build a raised bed! To allow easy access to your crop, aim for a bed that’s about three to four feet across. Dig a trench a few inches deep to accommodate a pressure-treated wooden frame, and fill with a soil mix that includes compost, manure, and rock dust for optimal growing conditions.

Making a sandbox20-sandbox-1

A sandbox brings kids hours of fun and is simple to make. Use pressure-treated pine boards for a sturdy frame. Neighborhood cats are notorious for their love of sandboxes, so while you’re at it, consider making a lid as well. Finish with stain or paint and (not least of all) sand.


21-screensaver-1Being a screen saver

They’re an important part of your home’s defense against insects, so when window screens snag, repair them. Pop the old screen from the metal frame and discard it along with the old plastic cording. Size a new screen, allowing a little extra along the perimeter. Insert it into the frame with new cording and trim the excess.

Installing a storm door22-stormdoor-1

Need extra insulation at home, or maybe just a little more natural light? Either way, a storm door is a great solution. First, measure your door from the interior frame. Be sure it’s square, and adjust with shims if needed. There’s probably a pre-hung door frame to fit your measurements, but if not, you can order a custom door.

23-grout-1Scouring grout clean

Little-known fact: Grout’s natural color is not mildew-gray. To successfully get at grout, spray warm water and scrub with a hard-bristled brush. For deep stains, cover with a baking soda-and-water paste, and spray with a mixture of vinegar and water for a cleansing foam. When the foaming stops, scrub and rinse your soon-to-be sparkling tiles.

Doing a quality paint job24-wallpaint-1

After you pick the perfect colors, clear the room of furniture and light fixtures (after disconnecting the power). Vacuum the walls, floors, and ceiling. Protect floors from drips with a drop cloth, and baseboards with painter’s tape. Keep the room ventilated, and wait a day or two before moving back in.

25-rewiring-1Rewiring a lamp

So your vintage lamp has gone dark. You can let there be light (again) by rewiring it. Unscrew the light bulb from the unplugged lamp and remove the old light socket. Unscrew the base of the lamp to remove the old cord. Thread in a new cord, add a new socket, and your old lamp will shine like new.


Cleaning stainless steel26-stainlesssteel-1

Sure, it’s called “stainless” steel, but we all know that scuffs or fingerprints can mar its surface. To care for stainless steel the right way, beware of bleach and abrasives. Wipe in the direction of the grain with a soft, soapy cloth. Remove stuck-on food with a nylon scrubber for a truly stainless look.


27-wallsconce-1Installing a wall sconce

A wall sconce adds instant style and can make a room look taller. To install, cut squares into the drywall just large enough to fit an electrical box and light switch. Turn off your power before pulling cable from the panel box to the switch. Install the electrical box and wall sconce according to manufacturer’s instructions.

Hanging wallpaper28-wallpaper-1

Wallpapering will go smoothly with these simple tricks. If you’re papering over a dark-colored wall, prime it so the old color doesn’t show through. Line up your pieces so the pattern appears seamless, allowing two inches of overlap at the edges. Start papering in an inconspicuous spot in case you end up with a break in the pattern.

29-outlets-1Replacing outlets

If your outlets need an update, cut the power and use a voltage tester to confirm that there’s no electricity running through them. Remove the faceplate, unscrew the outlet, and take note of which wires connected to which outlet. Hook up the new outlet, screw it into place and turn the electricity back on to test your work.\

Sealing the driveway30-driveway-1

Sealing your driveway can extend its life and improve your home’s curb appeal. Make sure the weather forecast is dry, then start by repairing cracks and washing off the driveway, allowing it to dry overnight. Apply the driveway sealant in small patches. Keep off the driveway for 24 hours to let your work set.


Feel free to share and like our FB page here: http://www.facebook.com/brusselshandyman

July home-maintenance checklist

Services

Use the good weather to clean and repair asphalt, concrete and fences. Prune or remove problem trees and protect landscaping from deer. Conduct your own home-energy audit and put insulating foam jackets on hot-water pipes.

Take advantage of warm weather while playing or doing chores to also cast a protective eye on your home and landscaping. By paying attention, you’ll learn to spot deterioration or changes before they turn into problems.

Give your home an energy audit
Take an hour to walk around your home with a notepad in hand, taking inventory of gaps and cracks. Experts estimate that you can save 20% on heating and cooling bills by plugging leaks.

Start your inspection inside. Turn off the electricity at the circuit box, then remove switch-plate covers to look for gaps. (Replace them with insulated covers for €3 to €4 each or install foam inserts — also called gaskets — for about 49 cents each. Both can be purchased at hardware stores.) You can insulate phone-jack covers, too.

Next, check the junctures where windows meet walls, walls meet floors and pipes and wires enter the home, plugging gaps with caulk. Other leaky zones include fireplace dampers, mail slots, window-mounted (or wall-mounted) air conditioners, attic doors, baseboards and weather stripping surrounding doors. Look for daylight, feel for drafts and listen for rattles, all clues to escaping heat. Next, check the house from the outside, examining the places where pipes, vents or wiring enter. Examine siding for gaps or damage, paying particular attention to corners where the material joins and where it meets other materials, like chimneys, windows or the foundation.

If you’d rather get a professional checkup, call your utility company for referrals. Many utilities even provide rebates for home-energy audits performed by recommended auditors.

Insulate hot-water pipes
Insulate the hot-water pipes in the basement or crawl space to save on heating costs next winter. Insulating pipes is done by snapping foam jackets – use pre-slit, hollow-core, flexible foam pipe insulation (called “sleeves”), purchased at a hardware store. (Prices vary but, for example, a 6-foot-long piece of foam insulation for half-inch copper pipe might cost less than a euro.)

When shopping, know your pipe’s diameter to get the correct fit. Exposed pipes pinch your wallet twice: You waste water running it as you wait for it to heat up, and you waste fuel when heat is lost as hot water runs through exposed pipes.

Tip: Slip sleeves on pipes running between the hot-water tank and the wall and also insulate cold-water pipes for the first 3 feet after they enter the house.

Clean patio furniture
Mix up a bucketful of soapy bleach solution to maintain your patio furniture. Here’s the recipe:

  • 2/3 cup trisodium phosphate (TSP)
  • 1/3 cup laundry soap powder
  • A quart of bleach
  • Three quarts of warm water

Remove cushions before spraying. Launder removable fabric coverings. Use a rag and soft-bristle brush to remove embedded dirt on synthetic coverings, metal and wood furniture. Rinse thoroughly and let dry. Spray wicker furniture with water and protect it with paste wax. Simply shoot the garden hose at resin furniture. To remove rust from metal furniture or bolts use Naval Jelly, available at hardware stores, with a wire brush. Wear rubber gloves and follow directions on the package.

Clean concrete
Power washers can be dangerous to decks (in the hands of amateurs, they can damage wood), but they’re just the tool for cleaning concrete sidewalks, driveways and patio and pool areas. If your garage or carport floor is marred by oil stains, saturate the area with a solution made from a cup of TSP mixed with a gallon of hot water. (Wear goggles and rubber gloves.) Let the solution soak for a half-hour, then scrub with a stiff-bristled brush. Rinse thoroughly and repeat as necessary.

While washing concrete, watch to ensure that the hard surface directs water away from the home’s foundation. If the concrete sends water toward the foundation, take action. First, inspect around the outside of the foundation for damage, looking for cracks and crumbling. Then check from the inside (go into the basement or crawl space) for water stains and wet soil. If water is getting into the foundation, hire a home inspector or structural engineer to help find a solution. You may need to redirect the drainage by removing or correcting the slope of the concrete. If that’s not feasible, a sump pump could be used to mechanically remove the water. A sump pump’s operation is triggered when water reaches a predetermined level under the home, setting off a floating switch.

Slip ‘feet’ under deck planters
Since standing water rots wood, make certain that water drains directly onto the ground when you water plants in pots and decorative planters on decks. Make drainage room by setting pots on pot “feet” (sold at garden-supply stores that carry pots). Or use pot stands – some have wheels that enable you to move heavy pots. Or for a frugal solution, just prop bricks under the pots, taking care to ensure that they’re stable.

Patch cracks in concrete
Inspect concrete for cracks. To patch them, clean the cracked area well with a wire brush and small broom. To repair narrow cracks, use masonry crack filler. It comes in cartridges and can be injected into the crack. For bigger openings, apply vinyl concrete patching compound, smoothing the surface with a putty knife.

Patch cracks in asphalt
You can extend the life of an asphalt driveway or path by inspecting it two or three times a year and using a caulking gun and asphalt patching caulk (
5 to 15 a tube) to repair cracks. If you leave cracks, they’ll grow and plants can take root, widening the damage. Squirt the caulk into the cracks and use a disposable putty knife to even the surface. Every five years, treat asphalt to a coat of asphalt sealer (50-100 for a five-gallon bucket). Brush it on with a squeegee or push broom..

Prune or remove problem trees
Get a certified arborist to inspect your trees and tell you if any are hazardous. Trees hanging over your roof, rubbing against gutters or dropping loads of leaves and sticks onto the roof should be pruned. Overhanging branches can provide a ladder for rats and squirrels, and diseased or damaged trees may fall on your home in a storm. A typical arborist’s fee is
65 an hour.

Trees can bring up boundary issues. They may straddle the property line between you and your neighbor or the branches from your neighbor’s tree may drop fruit onto your land. Although state tree laws vary, in general you have the right to trim branches on your side of the property line as long as you don’t endanger the life of the tree. If you kill the neighbor’s tree, you are liable. An arborist who understands local laws can be a great mediator between neighbors.

Clean exhaust fans
Exhaust fans do a lot of work in your home. In bathrooms, they push out moisture to keep walls and floors dry and prevent the growth of mold. (Be sure to run the fan before taking a bath or shower and keep it running for 15 minutes after you leave the room, so moisture has a chance to clear.) Before you begin cleaning the fan, turn off its power at the circuit-breaker box. Dust the vents on the fan’s cover (do this monthly). Use a screwdriver to remove the cover. Gently clean the inside of the cover and the fan blade with a slightly damp cloth or spray cleaner and a paper towel. Dry and reassemble. Do this twice a year.

In kitchens, exhaust fans vent moisture along with oily fumes. Making sure the electricity is disconnected at the circuit breaker box, start by removing the washable filter from the stove’s exhaust fan. You’ll find the fan either in the range between the burners or in a hood over the stove. If the fan can be pulled out, unplug it, remove it and extract the filter. Otherwise, just remove the filter. Put it through the dishwasher or soak it in warm soapy water. Vacuum the opening of the fan, then clean the blades and housing with a cloth and spray cleaner or degreaser.

Mend the fence
Even the cheapest new fences cost thousands of dollars. Protect your investment by looking for damage and making prompt repairs. Before touring your fence line, mow the grass low so you’ll have good visibility. Watch for signs that dogs have tunneled under the fence. Training and a watchful eye are the best ways to prevent dogs from digging. Otherwise, attaching a 2-foot-wide apron of wire mesh around the inside perimeter of the fence may work.

As you walk the fence, test the strength of the connections by gently tugging posts and slats to ensure they’re well-attached. Check fence posts for signs of rot (poke soft spots in the wood for crumbling or decay). Remove and replace the damaged areas. Keep fences painted or stained to protect the wood. Repaint or stain when the original finish is thin, cracked or peeling. Before painting, hose off and scrub dirty boards, letting them dry thoroughly.

Feel free to share and like our FB page here: http://www.facebook.com/brusselshandyman

June home-maintenance checklist

Home maintenance

Early summer chores should get you outdoors: Look for winter damage, ward off mold and rot, sharpen your tools and patrol your home’s perimeter for pests and other problems.

With the start of summer and warmer weather, you can focus most of your maintenance chores outdoors. First, however, attend to a couple of jobs that will help you stay comfortable and safe inside the house.

Switch ceiling fan blades
Switch ceiling fans to push cool air down, where you’ll most enjoy it. Observe the fan while it’s running: In summer, you want the leading edge of the blades (the part that goes around first) higher than the trailing edge (the part that rotates last). Locate the fan’s switch on its outside body. When set correctly for summer, you can stand beneath it and feel the breeze. This should allow you to adjust your thermostat higher (or set the air conditioning lower), saving fuel while enjoying the cooling effect of the moving air.

Clean dryer vents
Although you probably know to remove lint from your clothes dryer’s lint filter after each use (to prevent fires), you may not have heard that maintenance also includes cleaning the hose that pipes warm, moist air from the dryer to the outdoors. Use a long-handled brush, found in hardware stores (or search online for “dryer vent brush“). Also, clean the recess beneath the filter with a lint-trap brush. Make sure to purchase a brush that fits your dryer’s particular lint-trap type. Read the dryer’s manual for directions. Check vent hoses to ensure they fit tightly to each other, to the dryer and to the outside of the house. Pull out the dryer and vacuum accumulated lint under and around it.

Tune up yard and garden equipment
If your lawn mower has gas left over from last fall, empty the tank before adding fresh fuel. (Gas becomes stale after a month.) If possible, just run the mower until the tank is dry (best done in fall before storing the mower for the winter). If that’s not possible, use a siphon pump (
3 to €4 at a hardware or automotive supply store, composed of flexible tubing and a squeeze bulb) to transfer the old gas into a gas can. Take the old gas to your county’s hazardous waste disposal facility. Call ahead to learn hours and rules for disposing of fuel.

To keep your lawn mower running for years, you’ll also want to keep it clean. Avoid cutting wet grass; it’s hard on the mower engine. Frequently wipe, brush or scrape the mower’s underside clean (with motor off) so clippings don’t jam the blades. Change the oil each spring; change spark plugs and lubricate with every change of season (consult the owner’s manual for product specifications and directions); replace air filters every couple of years.

Sharpen mower blades
Proper cutting is key to a healthy lawn, and lawns cut with sharp blades need less watering (read 10 secrets to a perfect lawn). Also, hard work is made easier with sharp tools. Manufacturers recommend replacing mower blades yearly if the mower is used frequently. Check your blades’ effectiveness by examining the cut edge of the grass: If grass blades are ragged, the lawnmower blade is dull. You can extend the life of a mower blade by sharpening. Call a hardware store, garden supply store or lawn-mower dealer to learn where to get tools and blades sharpened (about
5 to 10) or purchase a sharpening tool (Dremel, for example, makes a head for rotary tools) or buy a whetstone or hand sharpener at a garden supply or hardware store. Before removing the blade from the mower to sharpen it, disconnect the spark plug wire (otherwise you could jump-start the engine by moving the blade). Also, wear safety goggles.

Clean gutters
Take advantage of dry weather to clear out leaves, needles and debris, leaving gutters free to carry rainwater away and protect your home from mold and rot. Depending on your home’s surroundings, you should do this several times a year. Hire someone (around
€100 to €200) or get a stable ladder (and someone to hold it) and do it yourself. Use a garden trowel or your (gloved) hands to muck out the debris. Scrub gutters with a non-metallic brush. Slosh water from a hose through the gutters and the drainpipes to finish the job and test that they’re clear and that water is flowing away from your basement, foundation or crawl space.

Tip: Newer ladders are rated for safety according to their use and the weight they can bear. An industrial-grade Type 1A folding ladder is safest for jobs under 17 feet, according to tests by Consumer Reports. Remain on or below the highest safe rung labeled on your ladder. Use an extension ladder for taller jobs. Keep aluminum ladders away from power lines.

Inspect gutters
While you’re at it, inspect the gutters. Look for joints separating, loose connections and attachments, sags, dips and corrosion. Tighten or reattach loose gutter connections.

Clean out downspout ends (also called “leaders”). These should extend out at least 3 feet at the ground, though some experts suggest 5 or 10 feet. The idea is to prevent water from running back to your home’s foundation.  At the same time, take care that your downspouts don’t drain onto your neighbors’ property, causing problems for them. Some cities have ordinances regulating the distance you can discharge your gutters from your property line (ask for details at the city planning department).

After you’ve cleaned and repaired your gutters, test them by having someone run a hose into the gutters while you walk around the house, looking for leaks and observing where the water drains. Or walk around the house to check during the next heavy rainstorm.

Consider gutter guards
If your gutters fill up frequently, you might want to investigate installing gutter guards (or screens, filters or covers) to reduce — perhaps eliminate — cleaning. There’s a wide variety, made from various metals or synthetics. Costs vary from around 60 cents a foot to
7 per foot, plus installation (the average house has roughly 200 feet of gutters), which means you could pay up to 1,500 for materials alone. You could hire someone to clean the gutters (at around €175 each time) for many years for that amount. Although gutter protection is marketed aggressively, systems vary in effectiveness. Check claims by searching product names, and get three or more references from customers who’ve used the product for several years. Then, call and interview each company.

Inspect for roof leaks
Start on the ground, using binoculars to scan for evidence of roof damage, including shingles that are curling, broken, cracked or missing. To check your roof for structural stability, stand across the street and look at the roof line. If it appears to sag, get a professional to inspect it. The cause could be damage to the roof supports from heavy snow or many layers of roofing materials.

Next, look for telltale signs of roof leaks. Inside, inspect the attic — look at the ceiling, rafters and walls, particularly right beneath the roof — for discoloration or stains. (While you’re up there, check to ensure that attic fans are working.) Pay attention to skylights and chimneys, which are prone to leaks. Seepage is most likely at joints and openings where one material meets another and where the flashing (seal) is weak. Go outdoors again and check the siding beneath the eaves for evidence of leaks. Call a roofer to repair leaks and reinforce flashing. Don’t put off patching a roof leak, since collected moisture can cause expensive rot and decay.

Check for foundation cracks
Make a yearly tour of your home’s foundation to spot any cracks. Hairline cracks and diagonal cracks that start at windows are unlikely to signal serious problems, but keep an eye on them to see if they change. Call a structural engineer if a small crack grows wider or if you find any of the following:

  • a crack wider than the thickness of your fingernail
  • horizontal cracks
  • a stair-step crack that break bricks, blocks or solid concrete
  • a pattern of cracks that rounds a corner
  • a crack with one side higher than the other
  • a crack that starts narrow and grows wider

To keep moisture out of cracks that you’ve found to be stable, fill them. Purchase a foundation crack repair kit (many include an instructional CD, goggles and gloves) that uses an expanding polyurethane filler for a permanent seal. Caulk and concrete aren’t effective for this. Learn more about foundation cracks and repairs at InspectAPedia.

Patrol the grounds
Spend a half-hour walking around your house with an eye to where the foundation meets the ground. Make sure the earth around the house slopes away from the structure — about an inch per foot is good — so water does not collect around the foundation. Dampness invites mold and mildew and, in worst cases, weakens a foundation. Also, keep your eyes open for signs of termites: wings or droppings that look like little pellets. Rake leaves away from the foundation to discourage mice and rats. Keep garbage cans tightly closed. Store recycling securely and clean bottles and cans well before putting them out so food odors don’t attract rodents. Turn compost piles regularly and compost only vegetable matter, not animal products.

Scrub the decks and porches
On a sunny day, wipe down and hose off lawn, garden and deck furniture. Sweep decks and porches. Inspect wood decks and porches for rot by pressing the wood with your hand, foot or a tool to find any soft spots. Gently probe soft spots with a screwdriver to learn the extent of the damage. Paint stores carry epoxy putty used to harden, seal and stabilize rotted wood. (These are potentially toxic products, so follow directions carefully.) If the damage is severe, replace rotted boards.

If you’re painting your deck, make sure to scrub it first. To remove mold from wood decks, use a solution of three quarts warm water, one quart household bleach, one-third cup detergent and two-thirds cup tri-sodium phosphate. Rinse thoroughly after scrubbing, then treat the deck with a commercial fungicide (found, along with TSP, at paint and hardware stores). Caution: Wear rubber gloves, work in a ventilated area and do not mix bleach with any products containing ammonia; the combination creates toxic fumes. To clean composite decking, follow the manufacturer’s instructions.

Seal decks against weather
Wood decks need to be painted or stained every two or three years — more often if they face extreme weather. Watch the weather forecast for a spell of several dry days before treating decks. (You don’t want to seal moisture into the wood and encourage rot.) If you’re unsure if the wood is sufficiently dry, borrow a moisture meter from a paint store (sales people will explain how to use it). Take readings in many spots. When the wood is dry, thoroughly strip old stain or paint before applying the new finish. Paint stores carry products for this purpose. When renting a power washer, ask for instructions and use it cautiously. Pressure washers can easily gouge and splinter wood decks and railings.

Feel free to share and like our FB page here: http://www.facebook.com/brusselshandyman

May home-maintenance checklist

Home maintenance

Summer is almost here, and it’s time to get your house in order for the hotter months. Here are tips to put your furnace to bed, store your space heaters, prep your cooling system, repair window screens and more.

When the weather turns warm, follow the impulse to fling open the windows and let in the fresh air and light: The sun’s ultraviolet rays are lethal to many harmful bacteria. May’s the time to ready your home for summer.

Baby your cooling system
Before firing up your air conditioner, change or clean the filter. You’ll want to change it every couple of months while the system is in use. The owner’s manual will explain how to change filters and clean coils and fins in the exterior evaporator unit. With the air conditioning turned off, check the evaporator unit for dirt, brushing and dusting it. Trim any surrounding shrubs. Remove the pan from the bottom of the unit, clean and replace it.

Keep algae, mildew and mold from forming:

  • Central air conditioning units have a pipe that drips evaporated moisture onto the ground. If this clogs, water can back up into the house. Each spring, clean the line by removing the cap at the access hole on top of the pipe. Pour a cup of bleach into it, letting the bleach drain to the ground. If a clog has formed farther up the pipe, attach the suction end of a wet-dry vacuum to the pipe’s end, wrap duct tape around the joint to create a temporary seal and run the vacuum briefly to remove the clog.
  • Window units: Stop the growth of algae and mold (and musty smells) by pouring two capfuls of bleach into the condensation pan (the drip pan located under the cooling coils). Do this monthly while you’re using the air conditioner. Also, dust the unit regularly.
  • Evaporative coolers: Open the unit and remove the drip pan. Examine it for leaks or rust. Replace cooler pads each spring.

Put the furnace to bed for the summer
Check the furnace filter, holding it up to the light to see if it’s dark and dirty and in need of a change. The instruction manual will tell you where to find these filters and how to remove and replace them. Vacuum the openings and grilles at heating and ventilation vents, registers and ducts.

Service the furnace and air conditioner
The transition from cool to warm weather is the sign that it’s time to take care of the appliances that keep you comfortable through the year. Call a professional to perform annual service on a furnace, air conditioner or evaporative cooler. Act early to book an appointment so you can avoid the summer rush. Call the company that installed the appliance or search online for licensed heating, ventilation and air conditioning specialists.

Replace vacuum cleaner bags
Remove the vacuum cleaner bag outdoors so you don’t release dust and allergens back into the house. Wear a bandana or dust mask to protect your lungs. While you have the vacuum cleaner open, dust it inside and wipe down the inside parts with a thin rag dipped in warm, soapy water and wrung out well. Keep water from the motor and electrical parts. Soak the vacuum tools in a bucket of soapy warm water, rinse and dry them. Let the machine air dry before installing a fresh bag and closing it up. Check the owner’s manual to learn how often to wash or replace filters in some newer vacuum cleaners.

Vacuum refrigerator coils
Remove the front cover from the refrigerator and use the wand attachment on the vacuum cleaner to carefully suck out the dust and dried bits of macaroni and dog food that have worked their way under the fridge.

Store free-standing electric heaters
Dust, vacuum or wipe down their surfaces and check cords and plugs for fraying and loose wires before putting them into storage.

Wash windows
Cleaning all the windows and window coverings in your home is a big, satisfying and several-hours-long project. Choose a sunny day and, if possible, get someone to work with you.

Remove curtains and blinds if you can. Clean windows and window trim, inside and out. Start by brushing (with a dry broom) or dusting the trim. If it’s really dirty, wipe it down with a rag and soapy water. Outdoors, use a hose to rinse off the soap. To clean the glass, use a good-quality squeegee, the tool of professional window washers. Before purchasing a squeegee, check the width of your smallest windows. Assemble a pole (unscrew the handle from a broom) that fits your squeegee’s handle, a microfiber cloth and a bucket. Use a few drops of liquid dish soap or a teaspoon of TSP in a two-gallon bucket of warm water. Many professionals like TSP, or trisodium phosphate, a powdered stain remover and degreaser found at hardware stores, for a streak-free finish.

Caution using TSP: In a hot solution, it can remove or take the gloss off paints and can darken aluminum or wood.

Apply the cleaning solution with a rag or mop. Immediately squeegee it off, wiping the blade between strokes to minimize dripping. Do one window at a time. Use the squeegee on the pole for hard-to-reach places. Consider engaging a professional to do second-story windows.

Clean and repair window screens
On a sunny day, take window screens out of storage and lay them on the grass, sidewalk or deck. Dust with a soft cloth or brush off dust with a clean paint brush. Dip a big (roughly the size of your hand), soft-bristle brush in warm, soapy water and gently scrub each side of the screen. Hose off each screen and put them in the sun to dry. Avoid tearing or pulling screens from their frames. You can mend small tears with a needle and thread.

If you need to replace an entire screen, it isn’t hard. The mesh is held in place by a strip of tubing that fits into a channel along the edge of the metal frame. Buy the mesh and tubing by the yard at a hardware store (bring measurements or the frame with you to the store, along with a sample of the tubing your window needs) and follow these steps:

  • Remove the old tubing (use a screwdriver to pry it out) and lift off the screen.
  • Cut the replacement screen larger than needed, fit it tightly to the frame while tucking the tubing back into the channel with a screwdriver. If you’ve got many screens to replace, consider buying a special tool to push tubing into the channel.

If you don’t want to do this yourself, search online for window dealers who’ll fix broken screens, calling several to compare prices.

Maintain exterior siding
Paint looks nice, but its main job, especially outside, is to protect from the deteriorating effects of dirt, sunlight and moisture. A paint job lasts an average of six to eight years, depending on weather and environmental conditions. Because it can cost thousands of dollars, do what you can to extend its life. As soon as the weather’s warm, examine the outside of the house. Trim shrubs that touch siding, windows or trim. Maintain a space of at least two feet between the home and plants in order to keep away damaging insects and moisture. Make sure that soil and landscape bark touch only the foundation, not siding. Where mold grows on siding, spray with bleach and water, let dry and rinse with a garden hose, scrubbing and repeating if necessary. Spray off winter dust, mud and debris with a garden hose and sprayer attachment. Hire a professional to use a power washer unless you’re experienced. These machines can do a lot of damage by dislodging or breaking shingles or siding, creating openings for mold and moisture. If you see blistering, peeling or thinning paint, move quickly to get at least three bids and schedule the paint job before fall.

Check outdoor hoses and irrigation systems
Freezing and thawing can heave the ground and even crack pipes and hoses, so turn on the water pressure and see how your irrigation system responds before you need it. Look for leaks, breaks, pooling water or clogged sprinkler heads. Repair, replace or call in the pros to get your irrigation system ready to run.

Feel free to share and like our FB page here: http://www.facebook.com/brusselshandyman

April home-maintenance checklist

Home maintenance

Fix fences, tighten your home’s energy efficiency, repair a screen door and make 8 cheap, fun improvements to give your home’s entrance some spring sparkle.

Finally, it’s spring. To celebrate, do a few improvements indoors — tweaking your home’s energy efficiency and getting doors to operate smoothly — and then get outdoors to do some work that shows off your home’s exterior. Install a new screen door or repair an old one. Maintain fireplaces and gas appliances while avoiding the scammers who pop out of the woodwork like bugs this season. Repair fences. Remove stubborn stains from concrete garage floors, patios and sidewalks. And try one or all of our eight cheap and fun ways to give your home’s entrance some exciting spring sparkle.

Inside
Install a programmable thermostat

Energy is wasted when you push up the temperature when the room feels cold or turn down the heat manually when it’s too warm. You can save about
150 a year with one of these devices.

A programmable thermostat lets you set the temperature in your home, then leave it. The most useful products give you options for establishing different temperatures for day and night (19°C at night, for example, and 17°C during the day), weekdays and weekends (keep the house cooler while you’re away at work and warmer when you’re home) and also let you turn the heat way down during vacations without changing your daily settings.

Cut energy expenses further
While you are in the mood to reduce energy consumption, call your electric utility and/or your heating-fuel company to ask about financial incentives for installing energy-efficient appliances or improvements. Some utilities subsidize the cost of improvements: adding insulation or weatherstripping, or installing that programmable thermostat, for example. Others give rebates for purchasing Energy Star appliances such as water heaters, air conditioners, dehumidifiers, heat pumps and fans. Also, remember to take the federal tax credit for such purchases. See the entire list at the Energy Star site. Senior citizens may qualify for additional subsidies.

Straighten out problem doors
Walk around the house with a can of silicone lubricant and a rag, trying each door. If a door is sticky, open it partway and pull the hinge pin out. The pin is found in the center of the hinge, in the joint between the plate on the wall and the one on the door. Lightly oil the pin and the hole into which it will fit, using the rag to stop drips. Drop the pin back in place. If a pin is stuck in a hinge, use a hammer and small screwdriver to knock it all the way out. Sand off accumulated oil, dust and rust from pin and lightly lubricate it before reinstalling. You may have to do this with both pins.

Outside
Repair or replace screen doors

Get ready for bug season by hanging screen doors. You can repair torn screens yourself:

  • Measure the screen opening. You’ll need overage, so add at least an inch to each side. Bring the measurements to a hardware store and purchase a new length of screen.
  • The screen is held in place by a flexible cord fitted into a channel that runs around the screen frame. Lift out the cord. If it is old and brittle, measure it and buy new cord at the hardware store.
  • Place the new screen over the opening, fit it snugly in place by settling the cord in its channel around the entire opening (poke it in place with a screwdriver). Trim the excess screen with scissors or a box cutter.
  • If the door sags, see if you can tighten it by replacing missing or corroded hinge screws.  If that doesn’t work, or if the door is bent or battered, purchase and install a new aluminum screen door.

Install a chimney cap
You could send out an invitation to birds and squirrels to come nest in the warmth of your chimney, or you could install a cap to protect the stack from dripping rain and uninvited critters.  A cap, sometimes called a “crown,” shelters the opening while it lets smoke escape. A cap prevents wind from entering your home and helps create a good draft that feeds your fireplace or stove with oxygen. Metal chimneys usually come with caps, but if yours doesn’t have one, ask the manufacturer for advice.  Caps are not appropriate for all chimneys. Ask your chimney sweep to inspect the chimney each year for damage and to advise you on whether to install a cap.

Beware chimney-sweep scams
Yes, you should have your chimney swept by a professional to remove flammable creosote that builds up inside the flue from wood smoke. (If you don’t use the stove or fireplace much, you can wait two to three years between cleanings.) But not every chimney sweep is right out of “Mary Poppins.” Door-to-door scammers prey on homeowners, dangling deliciously low prices, then pressuring owners into “repairing” expensive but fictitious problems. Protect yourself by using a chimney sweep with an established business in your town.

Have gas-burning furnaces and appliances inspected
Every year a licensed gas technician should clean out dust and debris and examine the appliance for safety, efficiency and repairs.

Spiff up the front entry
Few things say “spring” like freshening up the front entrance of your home. Try any or all of these improvements:

  1. Remove the doormat and sweep and dust the entry and all the way around the door. Clean the threshold with soapy water and a rag and gently wipe down the door.
  2. Take a hard look at the flower pots, furniture, plant hangers, toys, boots, shovels, brooms and tools cluttering the entrance; remove and store or throw away all but the most essential items. Wipe down porch and patio furniture.
  3. Stand back from the entry and decide what simple steps will most improve its appearance. A fresh coat of paint for the front door? Installing new house numbers? Adding two tall pots to flank the entrance (in colors that match or contrast nicely with the door)? Also consider painting the porch ceiling — a traditional color is blue, for the sky — or floor.
  4. Replace the doormat with a new one. Use mats inside and outside each door. They’re not just decorative; they protect your floors from damaging grit.
  5. Replace rusted or ugly exterior light fixtures.
  6. As soon as the weather permits and the wood has dried, repaint front steps with deck paint or other surfacing made for heavy traffic. Ask paint store professionals for recommendations. Take care to choose a color for the steps that works well with the house color and front door.
  7. Wipe down railings; sand, prime and repaint flaked, chipped or bubbled paint.
  8. Add another note of color by planting spring annuals in pots at the door, at the top of the steps or marching down the steps.

Check the fence line, cowboy
Take a tour of your back forty to see how the fence is holding up. Wiggle supporting posts to make sure they’re solidly in the ground. Use a mallet to drive them in deeper if necessary. Look for holes made by animals burrowing under the fence. You can fill these holes with big stones or install a wire mesh barrier as deep as necessary, then fill the hole with dirt.

Repair or replace broken fence posts, and sand down potentially dangerous splinters. Check wood fences for rot (soft, spongy or crumbling wood) and insect damage, holes, sawdust and weakness in boards. Repaint or re stain every couple of years or when you find chips and flakes in the paint. Use a durable product intended for use on fences. Ask paint store experts for recommendations.

Rake up
Take a leaf rake and a big tarp with you as you circle the house, gathering leaves, wind-blown debris and tree branches onto the tarp. When the tarp has a pile of leaves a couple of feet high, gather the corners and empty the contents into a yard-waste bin or a compost pile. With a broom, sweep off paths, sidewalks, steps and flagstones with an eye to removing obstacles on which people could trip.

Clean stains from concrete
For patios and sidewalks stained by fallen leaves and dirt, rent a pressure washer and clean the concrete. Auto oil stains on the garage floor or driveway are tougher to remove and call for some imagination. Fresh oil is easiest to get up. Tackle it as quickly as possible, soaking up the liquid with paper towels and sprinkling cat litter on the stain, crushing the litter in with your shoe, then sweeping it up. (Call your garbage company or city waste department to ask where to take oil-soaked rags, paper and litter. Don’t put them in the garbage can.)

Next, scrub the stain with soap, warm water and a nylon (not wire) scrub brush. This may do the trick, although you might need to scrub, rinse, check your progress and scrub again several times.

For really stubborn stains, get creative. You’ve heard that there are a million crazy ways to use Coca-Cola (see “20 Crazy Uses for Coke,” for example, at Gomestic). James and Morris Carey, at OnTheHouse.com, have one more cola trick: They soak stained concrete with cola, brushing it in with a stiff broom while the pop fizzes, keeping the concrete wet. Flood the stain with clean water once the fizzing stops, then bleach the area with this mixture: one cup of liquid chlorine bleach, one cup of powdered laundry soap and a gallon of really hot water. Rinse.

Feel free to share and like our FB page here: http://www.facebook.com/brusselshandyman

March home-maintenance checklist

Home maintenance

Become a moisture detective to keep your investment in good repair and get rid of fusty household smells.

It’s time to see what winter’s wind, rain and snow have done to your home and make fixes quickly to head off water-related damage. First, head outside.

Outside

Spiff up the front entry. One way to stay on top of your home’s maintenance and protect your investment is to look at it as though you’re a stranger considering it for purchase. Perform repairs as the need arises and try each year to add a little to the home’s attractiveness on the outside. One good way to boost curb appeal, as real-estate agents call it, is to make the entrance more appealing. Once the weather is dry, check steps, decks and porches for wood rot and peeling paint. Repaint porch steps and railings yearly with durable deck paint. Wash winter grime and dust off the front door and door frame. Repaint or stain the front door to protect wood doors and give the whole home a little face lift. Consider using a fun accent color such as barn red, black, hunter green, navy blue or gold, depending on the other colors on your home’s exterior. You may want to add built-in planters to a deck or front porch and change the plants with the season.

Check for roof dams. Now that the worst of the weather is behind us, pull a ladder up to the roof to check the valleys and remove accumulations of sticks, leaves, tree needles and other storm debris. Similar to the dangers posed by melting snow on a roof, dammed-up debris can let moisture penetrate the roofing and reach into structural timbers and walls, causing rot and mold. Also, check the flashings, or metal seals, around roof joints, chimneys, skylights and other structures that penetrate a roof for holes or rust. Make repairs or call a professional.

Check for water under the house. While spring rains are still falling, or shortly after, get beneath the house to see if there’s any accumulated water. It should be dry there, even when it’s raining outside. If not, first eliminate the possibility of leaks from inside the house by checking the underside of the floor for dripping water or water stains. Track down any plumbing leaks and repair them or call a plumber. If an inside leak is not to blame, look next for seepage from outside the house. Check where the foundation meets the ground for spots where the earth slopes toward the house. Even dirt mounded around shrubs should be corrected by replanting. Fix any sloping earth so that it directs water away from the house. If you live at the bottom of a hill, that may mean calling a drainage expert to diagnose problems or help devise solutions. Keep up preventive maintenance by trimming trees and shrubs to keep them from touching the house and channeling water down the walls; remove ladders, wheelbarrows and other equipment stacked against the outside of your home. Install extensions on gutter downspouts to keep water far from the structure.

Book a home inspector. The only time most folks meet a home inspector is during the sale of their home. But by then, you’re learning about troubles too late. To stay on top of your home’s maintenance and head off expensive repairs, hire a home inspector to scrutinize your home from top to bottom. Tag along on the inspection so you can see any problems for yourself and learn about your home by asking questions. The inspection will give you either peace of mind that everything’s in good shape or a list of chores to be done. Ask the inspector to help you prioritize the repairs.

Indoors
Now move indoors to complete your moisture-detective tour and perform some other TLC.

Banish household smells

  • Clean the garbage disposal. It’s good to get in the habit of doing this monthly. Pour a cup of vinegar into an ice cube tray, fill up the rest of the tray with water and stick it in the freezer. When the solution has frozen, pop out the vinegar ice cubes and place them in the disposal. Turn it on and let the ice cubes scrub the disposal as they are ground up. The vinegar will remove accumulated grease and eliminate odors coming from the disposal. Clean all drains, including the disposal, two or three times a year by pouring in equal parts salt, baking soda and vinegar, followed about 30 seconds later by two quarts of boiling water. Give the mixture a chance to work overnight to clear clogged drains.
  • Clean or replace garbage cans and pails. Check garbage containers inside and out for cracks and breakage. Replace cracked or broken outdoor cans and use bungee cords to keep lids closed tightly. Take the kitchen garbage pail outside, sprinkle in a half-cup of baking soda and fill the can with hot water. Let sit for an hour, then dump out the water and use spray cleanser to wipe down the can inside and out. Dry it thoroughly before putting it back in the kitchen and inserting an empty garbage bag. Clean the refrigerator by removing everything and washing down the inside with hot water and baking soda.
  • Eliminate bathroom and kitchen smells. Trapped moisture encourages smelly mildew, mold and rot, which can create odors in the kitchen, laundry and bathrooms. Thoroughly inspect each of these rooms for cracks and breakage in grout and caulking that let water seep behind tile and flooring. Check appliances for plumbing leaks by looking for moisture under or around sinks, tubs, washer, dryer, shower and toilets. Check for toilet leaks: Add a few drops of food coloring into the tank (not the bowl) of a toilet. Don’t flush. Come back in an hour to see if any of the color has reached the toilet bowl. If it has, you probably need to replace the flapper in the tank. If water is collecting around the base of the toilet, the seal – the wax gasket between the toilet and floor – may have failed and need to be replaced.

Install two simple water-saving devices:

  • Toilet-tank displacers. If you’ve been meaning to try some of those water-saving tricks you’ve read about, here’s an easy one to start with: Older toilet tanks hold a lot more water than they need for flushing. Cut water usage by displacing some of this tank water. Here’s how to displace water in the tank: Fill a clean, half-gallon plastic milk bottle with water and add some small stones to help weight it down, then lower the bottle into the tank, being careful to avoid the working parts. Or, purchase and install a Toilet FlushLess water displacement bladder bag. But whatever you do, don’t – as some advise – put bricks in the toilet tank. They’ll crumble and the sediment can wreck a toilet.
  • Aerators. Kitchen and bathroom faucets consume a great deal of water. Trim your home’s water usage by installing aerators in the faucet heads. Some shower heads accept aerators, too. Aerators mix air into the water to maintain good water pressure while reducing the amount of water flowing through the faucet. They cost EUR2 to 3 at a hardware store. Some water utilities give them free to customers. To install, screw the aerators onto the faucet tip. If you already have aerators on your faucets, remember to remove them annually to clean off any mineral deposits that can clog the screw-on screen and interfere with your water flow. Just toss and replace badly clogged aerators.

Inspect and repair drywall.  Once a year, walk around the interior of your home with a spatula and container of lightweight putty (ask at the hardware store for help choosing products). Inspect the walls for dings, nail holes and gouges. Use the spatula to smooth putty into holes and scrape the repaired spot even with the wall. Return the next day and touch the putty to see if it has dried. Once dry, gently rub it with fine-grained sandpaper so the patch will be smooth and even with the wall. Gently retouch the spot with primer, then with paint. If a repainted area shows up when dry, you may have to repaint the entire wall.

Feel free to share and like our FB page here: http://www.facebook.com/brusselshandyman

February home-maintenance checklist

Home maintenance

The transition between winter and spring is the time to get a jump on moisture damage and heat loss, make quick work of organizing storage areas and work in some garden prep before spring.

Don’t let winter slip away without using the cold, wet weather to help you detect where your home is leaking water and heat, giving you a chance to seal it up tight and develop a wish list for energy-saving improvements. Your first order of business inside your home is to make sure no water is getting in.

Carefully check every spot where condensation or water could enter your living areas and storage spaces. Take along a pad of paper and a pencil and take detailed notes as you scrutinize ceilings, under the roof, under the eaves and along window and door frames and ventilation seals. Be particularly careful to check under toilets, sinks, tubs and showers. Use a flashlight to check the crawl space or basement walls and floors and the underside of the first-story floor. You’re looking for visible moisture and for stains caused by moisture. When you find something, the remedy will depend on the source of the leak. You may just need to re-caulk around a tub or window, or you may need to call a plumber to replace a leaking fixture.

Here are some other tasks to tackle inside your home this month:

Change the shower curtain. While you’re checking for leaks in the bathroom, see if the shower curtain needs replacing. Damp shower curtains can grow unhealthy mold and mildew and contribute to mold problems in the tub and shower, so swap yours out periodically and make sure to open and air out the shower enclosure when you’re done bathing.

Batten down the hatches. Find and seal energy leaks. Grab a pad and pencil to note any spots that you can’t address right away. Arm yourself with a tube of caulk to fill small cracks and a spray can of insulating foam sealer for larger gaps. Tour your home feeling for cold air entering through cracks in chimneys and window and door frames, and cracks around appliance vents, electrical and plumbing fixtures and furnace ducts. Remedies might include adding weatherstripping to a door frame or applying fresh caulk to window frames.

Run the numbers. Get an idea of how much energy a home the size of yours typically uses by entering detailed information about your dwelling into the Home Energy Saver tool. The tool lets you calculate your home’s energy use. It also lets you estimate the energy savings from a variety of improvements, such as adding insulation, replacing windows and purchasing high-efficiency appliances. Experts from the Energy Department, the Environmental Protection Agency and other state and federal agencies collaborate in sponsoring the site.

Conduct a home energy audit. If you’ve sealed the obvious leaks and your home is still inefficient, you’ll get more detailed information from a professional energy audit. The auditor can recommend energy-saving improvements and point out those that will most improve efficiency.

Clean out storage areas. Get a head start on spring cleaning by attacking a cluttered storage space. Whether you go after the garage, attic, laundry room or garden shed, your home benefits when you get rid of rusting tools, leaking fluids and household chemicals. Start by taking everything out of the space and piling it up outside. Clean the empty space, then go through the items, trying to let go of everything you haven’t used in the last year. Make four piles: stuff to keep, trash, donations and recycling, and hazardous waste. Open paint cans to dry the paint completely before disposing. Recycle batteries so the lead they contain doesn’t contaminate ground water. Rules for disposal vary by locale. Call your waste-disposal company or the county landfill to learn where and how to dispose of hazardous waste.
Get a fire extinguisher. Better yet, get several. Buy fire extinguishers for each type of fire you might encounter at home and place them where you’ll need them. For example, use the A-B-C class for living areas and in workshops and garages. For the kitchen, get a specialized extinguisher capable of putting out class B (grease) and C (electrical) fires. For living and sleeping areas and fireplaces, get a multipurpose A-B-C that also works on fires consuming wood, cloth, trash and paper. Inspect extinguishers regularly to ensure the gauges read 100%.

Outside
February is a transitional month in much of the Western Europe. Winter storms may continue to cause damage to home exteriors and landscaping, but spring is in sight and you can begin working in the garden to prepare for warmer weather.

Check for storm damage. While you’re outside, walk around the house looking for missing or damaged siding and shingles. Remove fallen branches and storm debris from around the house.

Clean the gutters. It’s easier to scoop up the leaves and debris in your gutters when the stuff is wet, so pull out your ladder and clean the gutters after a soaking rain. You should do this at least twice a year, but may need to do it monthly if your home is surrounded by trees.

Mulch garden beds. By the end of the month, the ground has thawed in many parts of the country and it’s time to start warding off weeds. If you didn’t mulch in early winter, now is the time to add a layer to discourage weeds.

Prune ornamental grasses. Clean up pampas grass and other ornamental grasses by cutting them in early spring, before new green shoots get tall. Cut the old grass about 2 to 4 inches above the new green shoots. Wear gloves and use a chain saw on big, unwieldy pampas grasses. Tackle others with pruning shears or hedge clippers. Cut straight across the top of the clump and rake away the dead stalks to clean up the plant.

Feel free to share and like our FB page here: http://www.facebook.com/brusselshandyman

January home-maintenance checklist

Home maintenance

The most important job this month is to prevent water damage from bursting pipes and leaks in your home.

The dead of winter is the time for the greatest vigilance in your home-maintenance routine. The most important job this month is to head off damage to your home from water and dampness from a number of sources:

  • Groundwater and rain seeping into your home.
  • Leaky pipes inside the walls.
  • Pipes bursting from freezing and thawing.

Take a tour
After a winter storm, get outside as soon as you can. Walk around the house, checking for damage from wind and broken tree limbs. Use binoculars if you can’t see your entire roof. Scan for loose or missing shingles.

Give special attention to vulnerable pipes — indoors and out — that are exposed to the cold, including hose bibs, pipes in outside walls, garden sprinkler lines, swimming pool pipes and pipes in unheated attics, basements and garages. A frozen pipe needs only a one-eighth-inch crack to leak as much as 250 gallons a day, according to this State Farm Insurance video below, which demonstrates how to shut off your water and insulate pipes.

Take these steps to safeguard against damage from frozen and bursting pipes:

  1. If practical, insulate any pipes exposed to the cold. Ask hardware-store personnel for the best materials for the job.
  2. Seal any leaks that are letting cold air in, especially around dryer vents and pipes and where electrical wiring enters the house.
  3. Search for uninsulated water supply lines in the attic, garage, basement and crawl spaces and in bathroom and kitchen cabinets adjacent to outside walls. During a cold spell, open cupboard doors in the kitchen and bathroom so the home’s heat can reach them. (Reminder: Put harmful household cleaners out of the reach of children.) Keep doors shut tight in the garage and outside closets and cupboards during freezing weather.
  4. When temperatures drop below zero, open both hot and cold faucets a trickle to relieve pressure in the pipes.
  5. Locate your home’s water shut-off valve; learn how to turn off the water quickly in case a pipe bursts.
  6. If you’ll be gone in freezing weather, even overnight, ask a friend or neighbor to check on your house for broken or leaking pipes. Show him or her how to shut off the water.
  7. Keep temperatures inside the house at 55 degrees Fahrenheit or above, night and day, even when you’re gone.
  8. Promise yourself that when the weather improves you will add to the installation in the basement or crawl space and attic.

Leak prevention

  • Install small, battery-powered individual leak alarms, also called flood alarms, under the refrigerator, kitchen and bathroom drain pipes, dishwasher and laundry appliances and behind toilets. Cost: around $10-$15 each.
  • Check to make sure your sump pump is operating properly. If it has a battery backup, unplug the pump from the wall and test it.

Look for pests seeking shelter
Cold weather drives mice and insects into the walls of your home. Even unheated parts of the house invite these pests. Insects need only a crack to enter, and mice can get in through a dime-sized hole. Houseflies, particularly, pose a health risk because they can transmit disease.

  • Seal any cracks where pests enter.
  • Empty compost and garbage frequently.
  • Keep food covered and put away; keep counters clean.
  • Fix leaky pipes quickly.
  • Pour boiling water down bathroom and kitchen drains monthly, preventing the buildup of bacteria-laden sludge; scrub removable drain covers weekly.
  • Check basement, attic, crawl spaces and the back of cupboards and cabinets for mice droppings or holes. If you find evidence, install traps immediately or call a pest-control service.
  • Pick up and dispose of outdoor pet waste promptly; turn compost piles frequently.

Make an inventory
An inventory is a record of your home’s features, conditions, furnishings and valuable possessions. If your home is damaged or destroyed by fire, flood, mudslide or other disaster, you can use the inventory to substantiate your insurance claim to get the maximum replacement value for what was lost.

Your inventory doesn’t have to be fancy. You can get started and add to it later. Supplement your record with photos or video. Here’s a fine example: http://wp.me/p4FWFF-14.

Tips:

  • Save receipts for valuable home purchases and for work you have done to upgrade the interior or exterior of your home.
  • Keep a copy of your inventory in a bank safe-deposit box or on a hosted server online, so you can get it even if your computer is destroyed.

Also …
Here are a few more winter tasks:

  1. Check the labels on the switches in your electrical circuit-breaker panel and make new labels if necessary.
  2. Check your furnace filter monthly in the winter to see if it needs replacing.
  3. Use a vacuum-cleaner tool or a long-handled brush to clean under and behind the refrigerator, including the coils.
  4. Clean lint from under laundry appliances, especially the dryer, carefully work the cleaning tool down into the lint filter; outdoors, clean the dryer vent outlet, reaching as far as possible into the pipe.
  5. Gather product documents and warranties into a folder. Go through the contents and discard outdated materials.
  6. Walk around inside the house with a screwdriver, pencil and paper. Tighten any loose knobs and attachments and list repairs to tackle later.
  7. Examine the ducts of your forced-air furnace and seal any leaks with duct tape.
Feel free to share and like our FB page here: http://www.facebook.com/brusselshandyman